This dialog can contain padlocks ![]() depending on the properties of the elements you have selected. Read all about the padlocks in this article.
depending on the properties of the elements you have selected. Read all about the padlocks in this article.
With the button ![]() you can:
you can:
- consult the cross-section properties;
- define cross-sections based on self-imposed dimensions
The following dialogue appears. The cross-section properties are organised into 4 categories we’ll discuss further in this article.

Dimensions

- Give the cross-section a name.
- Choose the desired cross-section shape from the drop-down menu
 .
.
Not all shapes have the same purpose, therefor some shapes might not do what you want them to do. Consult the table below for more information. - Enter the required dimensions. They are always presented in a standard drawing of the cross-section. Once all the dimensions are inserted, you can ask a rending of the cross-section based on the entered dimension using the tab page “Axes”. In the case when the geometric axes do not correspond to the main axes of inertia (U and V) will also be drawn.

- Choose if the cross-section is constant or variable.
When you select “variable” the option “values related to group ‘Sections’” becomes visible. This option is used to define a variable cross-section over multiple bars (see Groups for defining cross-sections).
Variable dimensions are not applicable to cold formed and user defined cross-section shapes.
| Parameters for elastic analysis | Parameters for unity check (Eurocode 3) | ||
|---|---|---|---|
| Cross-section procceded by | ✓ | ✓ | |
| ✓ | ✓, until class 3 For class 4, you should impose the effective properties | ||
| ✓ | ✓ | ||
 | ✓ | ✓, until class 3 For class 4, you should impose the effective properties. Also for class 4, EN 1993-1-6: Strength and stability of shell structures applies. Diamonds does not support this part of Eurocode. | |
| ✓ | not possible [1] | ||
| ✓ | not possible [2] | ||
(for Section Utility manual, click here) | ✓ | you should impose additional properties For class 4, you should also impose the effective properties. | |
[1] For the cold formed cross-sections in the library, the effective properties have been provided by the manufacturers. If you select one of these cross-section shapes and change its dimensions or impose them from zero, Diamonds is not capable of recalculating these effective properties! Therefor you cannot run a unity check on these cross-sections
[2] These cross-sections shapes are intended for concrete design.
Section properties
- If the cross-section is based on a default form , the elastic and plastic properties will be calculated automatically, provided that “Automatic calculation” is checked.
If the tick box is unchecked, you can assign a different value to each property.
The effective and design properties can only be calculated automatically for some shapes (see table above). - If you choose a steel cross-section from the library
 , the ‘Calculate automatically’ option will be unchecked. The properties are taken from catalogs provided by the manufacturers.
If you check the ‘Automatic calculation’ option, formulas are used to calculate the properties. This can lead to small deviations.
We distinguish 5 possible categories of characteristics that are each displayed in a separate tab. Depending on the material assigned, some tabs and / or properties may not be accessible. We will go through the different categories below.
General

- Specific weight and gross surface area
- COGy, COGz the coordinates of the centre of gravity (COG)
- SCy, SCz the coordinates of the shear centre (SC)
By default, these coordinates are expressed in relation to the coordinate system with origin in the lower left corner of the cross-section. You can see this coordinate system when you click on the tab page “Axes”.
You can also opt to show the coordinates in relation to the centre of gravity. - The parameters λu and λv are used when calculating the shear deformation. The indices ‘u’ and ‘v’ refer to the principal axis of inertia of the cross-section.
Source for calculation method:- Timoshenko, Strength of materials Part I, §39 on page 170-174 (method without warping) and §66 on page 296-300 (method with warping).
- R. Van Impe, Berekening van Bouwkundige Constructies I, §5.1.2 (method without warping).
Elastic

- Sy, Sz the static moment of the cross-section according to axes Y and Z
- Iy’, Iz’ the moment of inertia of the cross-section according to axes y’ and z’
- iy‘,iz’ the radius of inertia or radius of gyration of the cross-section in the directions y’ and z’
- Iyz the product of inertia of the cross-section according to axes y’ and z’
- Wel,y’,t the elastic moment of resistance according to bending around the axis y’, at the level of the top fibre of the cross-section
- Wel,y’,b the elastic moment of resistance according to bending around the axis y’, at the level of the bottom fibre of the cross-section
- Wel,z’,l the elastic moment of resistance according to bending around the axis z’, at the level of the extreme left fibre
- Wel,z’,r the elastic moment of resistance according to bending around the axis z’, at the level of the extreme right fibre
- It the torsion constant
- Iw the warping constant
- Twm the torsion module
- α the angle between the axes of principal inertia and the local axes y’ and z’ of the cross-section
- Iu, Iv the moment of inertia of the cross-section according to the principal inertia
- Wel,u,t the elastic moment of resistance according to bending around the strong axis of inertia u, at the level of fibre with the biggest coordinate v
- Wel,u,b the elastic moment of resistance according to bending around the strong axis of inertia u, at the level of fibre with the smallest coordinate v (top fibre)
- Wel,v,t the elastic moment of resistance according to bending around the strong axis of inertia v, at the level of fibre with the biggest coordinate u
- Wel,v,b the elastic moment of resistance according to bending around the weak axis of inertia v, at the level of fibre with the smallest coordinate u (bottom fibre)
Plastic

- Wpl,y the plastic moment of resistance for bending around the axis y’
- Wpl,z the plastic moment of resistance for bending around the axis z’
- Wpl,u the plastic moment of resistance for bending around the strong axis of inertia u
- Wpl,v the plastic moment of resistance for bending around the weak axis of inertia v
- Avz, Avy the shear surface in the directions z’ and y’
Effective

- eNy, eNz the displacement of the centre of gravity of a reduced cross-section (if the cross-section is only subject to uniform compression).
The displacement causes an additional bending moment around the axis y’, whereas the eccentricity eNz generates an additional bending moment around the axis z’. The sign of this eccentricity is important because the additional moment will be applied only if it causes an adverse effect (therefore, if ΔM has the same sign as MEd). A positive eccentricity means that the neutral line was displaced along the positive local axis of the cross-section. The eccentricities eNy and eNz of double symmetric profiles are always equal zero. - Aeff the effective area of the cross-section when the cross-section is loaded with compression only
- Weff,y’,t the effective moment of resistance of the cross-section in case of bending around the y’-axis, at the top fiber
- Weff,y’,b the effective moment of resistance of the cross-section in case of bending around the y’-axis, at the bottom fiber
- Weff,z’,l the effective moment of resistance of the cross-section in case of bending around the z’-axis, at the left fiber
- Weff,z’,r the effective moment of resistance of the cross-section in case of bending around the z’-axis, at the right fiber
Notes:
- If the local axes y’ and z’ do not correspond to the principal axes of inertia, you need to replace the notations y’ and z’ with u and v.
- Although you can define here a different effective moment of resistance for the top and the bottom (the left and right side) of the cross-section, it will always be the smallest value that will be used in the steel and timber verification.
- In the presence of an asymmetrical section whose features are calculated automatically, you will always find the same value for the same reason.
- More specifically, this approach means that it is possible to obtain a conservative (= safe) result if the cross-section is subject to a compression and bending (N+M).
- For sections with variable dimensions, the user must impose the effective properties for the smallest and largest section.
Design

- αy, αz the imperfection factors for buckling around the y’- and z’-axis.
- αLT the imperfection factor for lateral torsional buckling
- tmax the maximum plate thickness for the determination of the yielding strength
- My, Mz, N the cross-section class when the profile is subject to a compressive force (N), to a bending moment around its weak axis (My) or to a bending moment around its strong axis (Mz)
- For sections from the library
 and sections based on a default shapes (
 > ) the section class is determined automatically during the steelcheck.
 - For random sections (Section Utility ) you must impose the section classes.
If the section is of class 4, he should also impose the effective properties.
- you can determine a different cross-section class for N, My and Mz separately. For combinations of normal force and bending moments N+My and N+Mz:
- the class associated with calculating the resistance to normal force is determined using the class for N
- the class associated with calculating the resistance to a bending moment is determined using corresponding the class for M (so My or Mz).
- For sections from the library
- Eurocode 3 divides the verification of steel sections in two parts:
- EN 1993-1-1 for sections with thickness t ≥ 3mm
- EN 1993-1-3 for cold formed sections with thickness t < 3mm.
- If the option ‘Use design code for cold formed thin-walled section t < 3mm’ (= EN 1993-1-3) is checked, the following properties will also be required:
- Vz,Rd the design resistance to shear in the z’-direction
- Vy,Rd the design resistance to shear in the y’-direction
- fya the mean yielding strength
- And finally you can also opt to apply the additional rules for purlins (EN 1993-1-3 §10).
Material, production method, grain direction and concrete cover

- Select a material for the bar using the drop-down list. It contains all the materials present the Material Library.
Concrete cover
- For a concrete bar, you also need to indicate the gross cover.
The gross cover is understood as the distance between the reinforcements centre of gravity and the upper or lower edge of the cross-section.
Click to open the following dialogue.

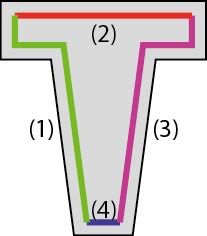
- In terms of placement, you have 3 options: All sides, Upper and lower, Left and right
Upper (z’>0), lower (z'<0), left (y'<0), right (y’>0) refer to the local coordinate system of the bar.
The figures below illustrate where exactly these reinforcement zones are located for different cross-section shapes:


In terms of distribution, you have also 4 options: ‘optimized’, ‘identical’, ‘proportional’ and ‘imposed’ (more info). With ‘imposed’ you define the distributions.
You can combine any placement with any distribution, although in some cases this will lead to less economic quantities.
Grain direction
- For rectangular variable timber sections, the button
 will be shown. Here, you can specify the angle between the fibre direction and the axis of the bar. You can choose between:
 | The timber fibre direction is parallel to the axis of the bar. |
 | The timber fibre direction is parallel to the upper side of section |
 | The timber fibre direction is parallel to the lower side of section |
Based on the fibre direction, Diamonds will calculate the angle between the fibre direction and the x’-axis. This angle is needed for the strength and stability check according to §6.2.4 of EN 1995-1-1. For all other variable timber sections, the fibre direction is set parallel to the axis of the bar.
Local axes

- Orientation angle
The local axis x’ is always located in the prolongation of the bar and it cannot be modified.
However, you can to rotate the cross-section around this axis. This option has the same functionality as this dialogue .
. - For variable sections, you can switch the assigned section 1 or 2 at the beginning and end point using the buttons
 .
. - If you want to mirror the local axis y’ (strong axis) of the bar, click on
 .
.
