With the button ![]() you can design elements in reinforced concrete.
you can design elements in reinforced concrete.
1•2•Build will try to find the optimal section within defined limits for width and height. He will also take the imposed maximum (elastic!) deflection into account.
You must specify the concrete strength, steel grade and gross coverage. The gross cover is the distance from the outer surface of the concrete to the centre of the longitudinal reinforcement.

Once the calculation is completed, 1•2•Build shows a cross-section containing a reinforcement proposal. This proposal takes the maximum theoretical reinforcement amount into account. It also imposes a constant distance between the stirrups. You can also impose a reinforcement configuration by double clicking the bar. If 1•2•Build cannot find a suitable cross-section, a warning will pop-up and a skull will be shown next to the relevant bars.

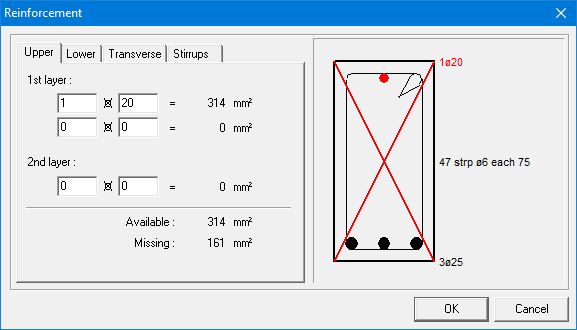
A custom reinforcement configuration
You can impose a custom reinforcement configuration by double clicking the relevant bar after completing the design. In the dialog that appears, you can change the upper and lower reinforcement, the reinforcement along the sides and the stirrups by using the different tab pages.

However, it is not possible to define reinforcement that doesn’t meet the requirements of the calculation. In that case, 1•2•Build will draw a cross over the cross-section indicating that the defined practical reinforcement is insufficient.