When creating the plot file, ConCrete Plus exports the geometry to the CAD program in its real size, measured in the selected plot units (menu “Preferences” – “Plot Units”), regardless of the plot scale. The plot scale is used to define the ‘real’ size of the font.
For instance, if the font size is set to 3 mm and the plot scale is 1 / 50, then ConCrete Plus exports a font with real size 3 mm x 50 = 150 mm. When in the CAD program the plan is plotted on 1 / 50, the final font size will be indeed 3 mm. If that same plan is plotted at 1/100, then the final font will be 1.5 mm.
Go to the menu “Layout” –“Plot settings” – “Plot scale…” command to set the plot scale. The following dialog box will appear:
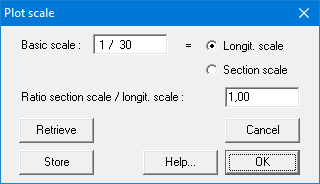
Here you can define the longitudinal scale and the section scale. They can be different from each other.
With the button “Store” you can save the current input as default. With the button “Retrieve” you can replace the current content of the dialog with the default values.
Bij het aanmaken van het plotbestand stuurt ConCrete Plus voor wat betreft de geometrie alle werkelijke afmetingen, uitgedrukt in de gekozen ploteenheden (via menu “Voorkeur” – “Ploteenheden“), naar het tekenpakket door, ongeacht de ingestelde plotschaal. De ingestelde plotschaal dient voor het bepalen van de werkelijk door te sturen lettergrootte.
Is er bijvoorbeeld een bepaalde stijl waarin voor de lettergrootte in het plotbestand 3 mm opgegeven wordt, en staat de plotschaal ingesteld op 1/50, dan stuurt ConCrete Plus als lettergrootte door: 3mm x 50 = 150mm. Wanneer in het tekenpakket effectief geplot wordt op 1/50 zal de uiteindelijke lettergrootte dus inderdaad 3 mm bedragen, wordt diezelfde tekening (doorgestuurd met plotschaal 1/50) evenwel op bijvoorbeeld 1/100 geplot, dan bedraagt de uiteindelijke lettergrootte slechts 1.5 mm.
Selecteer in het menu “Layout” – “Plotinstellingen” – “Schaal…” om de plotschaal in te stellen. Op het scherm verschijnt volgend dialoogvenster:
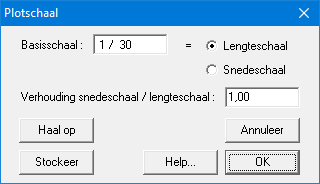
Hierin kan de lengte- of doorsnedeschaal opgegeven worden. Lengte- en doorsnedeschaal kunnen van elkaar verschillen.
Met de knop “Stockeer” bewaar je de huidige inhoud als default inhoud. Met de knop “Haal op” vervang je de huidige inhoud van het dialoogvenster door de default inhoud.
ConCrete Plus envoie les plans de ferraillage en grandeur réelle, exprimée en unités du dessin, quelle que soit l’échelle du dessin. L’échelle du dessin sert à déterminer la grandeur réelle des polices de caractères.
Si nous avons, par exemple, un style avec la taille de caractère pour le fichier de dessin égale à 3 mm, et si l’échelle du dessin est mise à 1/50, ConCrete Plus transfert alors une taille de caractère de 3 mm x 50 = 150 mm. Quand le dessin est tracé à partir du logiciel DAO à une échelle 1/50, la taille résultante des caractères sera effectivement 3 mm; par contre, si ce même dessin (exporté de ConCrete Plus avec une échelle de 1/50) soit tracé à une échelle de 1/100 par exemple, alors la taille des caractères ne vaudra que 1,5 mm.
Afin d’introduire une échelle de dessin, allez ver le menu “Format” – “Dessin” – “Echelle du dessin…“. La fenêtre de dialogue illustrée est alors affichée à l’écran.
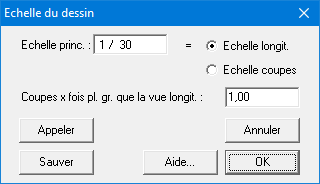
Ici, vous pouvez introduire l’échelle principale du dessin. L’échelle principale peut être celle de la vue longitudinale ou celle des coupes. La vue longitudinale et les coupes peuvent éventuellement être tracées avec deux échelles différentes.
Avec le bouton “Sauver“, vous enregistrez le contenu actuel comme contenu par défaut. Avec le bouton “Appeler” vous remplacez le contenu actuel de la boîte de dialogue par le contenu par défaut.
