To make drawing easier, 1•2•Build allows you to define a grid. When the grid is active, the cursor will automatically snap to the grid points when drawing. To define the grid, select the menu instruction ‘Screen – Grid’ or click on the button ![]() in the icon bar.
in the icon bar.

You can independently activate or deactivate the grid and make it visible or invisible. The grid step can be set differently according to the X and Y direction. The grid is only shown in a 2D view, never in the perspective view.
Om het tekenen te vergemakkelijken, laat 1•2•Build u de mogelijkheid om een raster te definiëren. Wanneer een raster actief is, zal de cursor bij het tekenen automatisch snappen naar de rasterpunten. Om een raster in te stellen, selecteert u de menu-instructie ‘Scherm – Raster’ of klikt op de knop ![]() .
.

U kan onafhankelijk van elkaar het raster al of niet activeren en al of niet zichtbaar maken. De rasterstap kan verschillend ingesteld worden volgens de beide richtingen X en Y. Het raster wordt enkel getoond in het verticale aanzicht, nooit in het perspectiefzicht.
La fenêtre du modèle 1•2•Build est munie d’une trame lorsque l’on souhaite dessiner la structure. Cliquez sur l’icône ![]() pour appeler la fenêtre de dialogue permettant le paramétrage de cette trame.
pour appeler la fenêtre de dialogue permettant le paramétrage de cette trame.
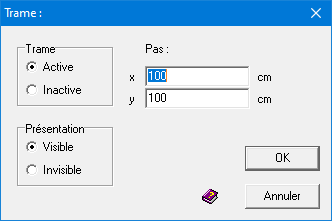
Comme vous le constatez, la trame peut être active ou non, visible ou non. Le pas de la trame se définit dans les 2 directions principales X et Y.
