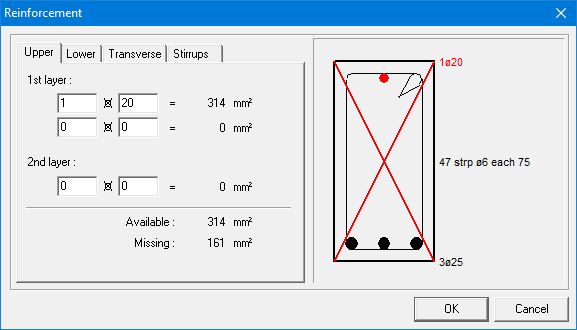
You can impose a custom reinforcement configuration by double clicking the relevant bar after completing the design. In the dialog that appears, you can change the upper and lower reinforcement, the reinforcement along the sides and the stirrups by using the different tab pages.

However, it is not possible to define reinforcement that doesn’t meet the requirements of the calculation. In that case, 1•2•Build will draw a cross over the cross-section indicating that the defined practical reinforcement is insufficient.
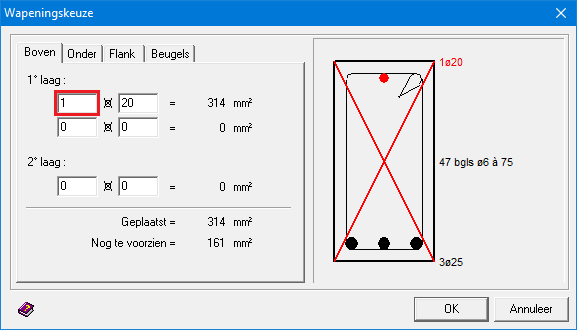
U kan steeds een eigen wapeningsconfiguratie opleggen door de desbetreffende staaf te dubbelklikken. In het venster dat verschijnt, kan u zowel de boven- en onderwapening, flankwapening en beugels aanpassen. Gebruik hiervoor de verschillende tabbladen.
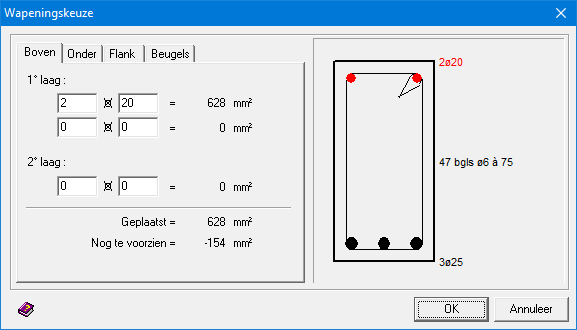
Het is evenwel niet mogelijk een wapening te specificeren die niet voldoet aan de eisen van de berekening. Dit zal overduidelijk blijken uit de grafische voorstelling van de praktische wapening.
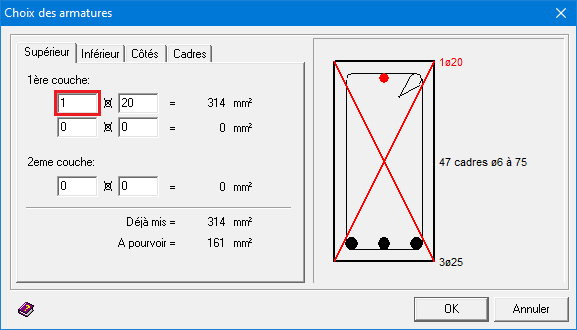
L’utilisateur peut toutefois lui-même proposer une autre configuration. A cet effet, il suffit de double-cliquer sur la barre pour afficher une fenêtre de dialogue dans laquelle les choix des armatures sont paramétrables.

Un contrôle direct est effectué pour vérifier la quantité d’armature proposée par rapport à la quantité minimale calculée. Si cette dernière était plus grande, une croix rouge apparaîtrait sur le dessin pour bien signaler que le ferraillage n’est pas suffisant.