This article explains how to send a model from Diamonds to Tekla Structures, using BIM Expert.
1. Preparation in Diamonds
If you want to results to be transferred to Tekla Structures, make sure the model is calculated and that elastic results are available.
If you simply want to have the geometry model in Tekla Structures, without further BIM workflows, analysis in Diamonds is not required.
2. Send the Diamonds model to Tekla Structures
2.1 From Diamonds to BIM Expert
In the File menu tab, select ‘Export > Export to BIM Expert’ or simply use F8.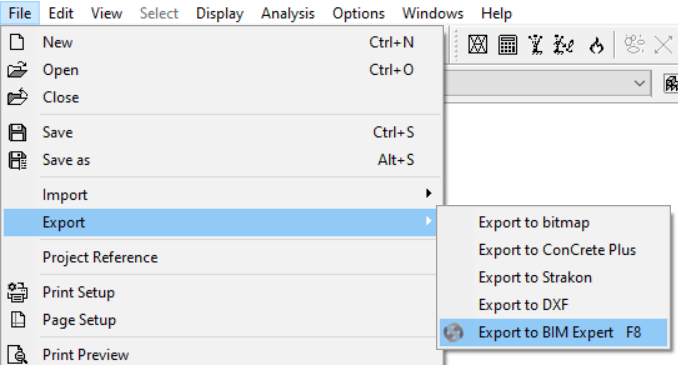 The geometry model is sent to BIM Expert. All sections and materials are automatically converted and transferred, as well as the loads and results (if present). The model is now in BIM Expert.
2.2 From BIM Expert to Tekla Structures
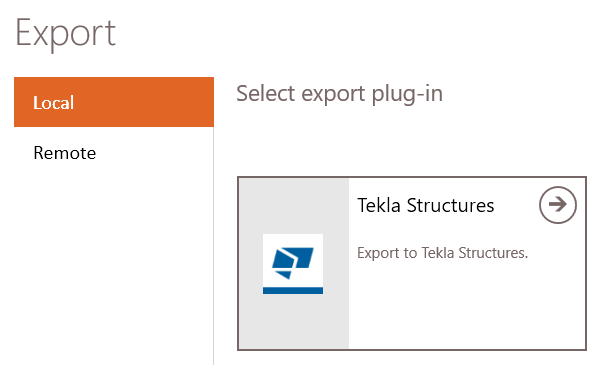
In the Model tab, select ‘Export’. Next, choose the destination software, namely Tekla Structures. Click ![]() to continue.
to continue.
2.2.1 Settings
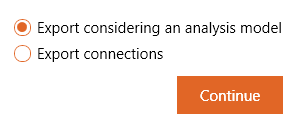
Choose ‘Export considering an analysis model’ and hit ‘Continue’.
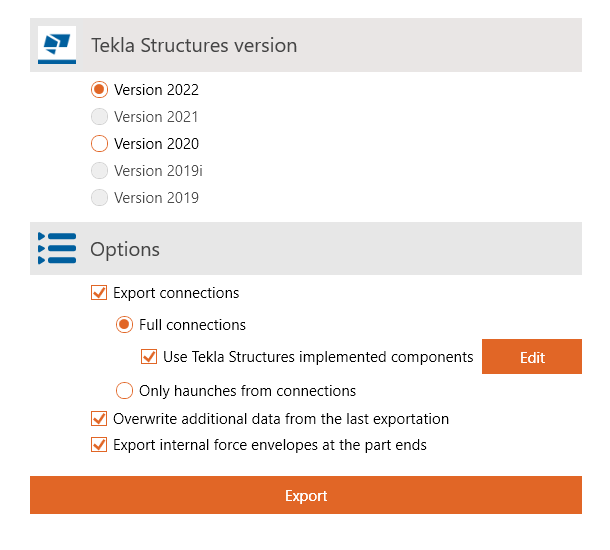
Select the desired version of Tekla Structures, select the desired options and click ‘Export’.
In case the Tekla Structures project has already a model inside, BIM Expert will ask you how the new analysis model should be handled:
- Option 1: replace the old analysis model by the new one
- Option 2: create a new analysis model + give the new analysis model a name
- Option 3: copy the properties and settings of the old analysis model and export the new model to this.
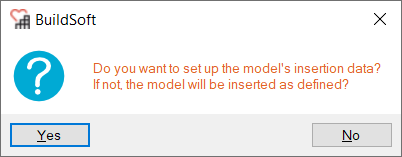
In case the Tekla Structures project is empty, you can opt to specify the insertion data:
- ‘Yes’ to define the insertion data.
- ‘No’ to use the default insertion data.
2.2.2 Material mapping
In case not all sections or materials can be automatically mapped, you will see a dialog window to map BIM Expert’s materials with Tekla Structures materials. Click on the button with the 3 dots ![]() to open Tekla Structures’ material library and search for a match.
to open Tekla Structures’ material library and search for a match.
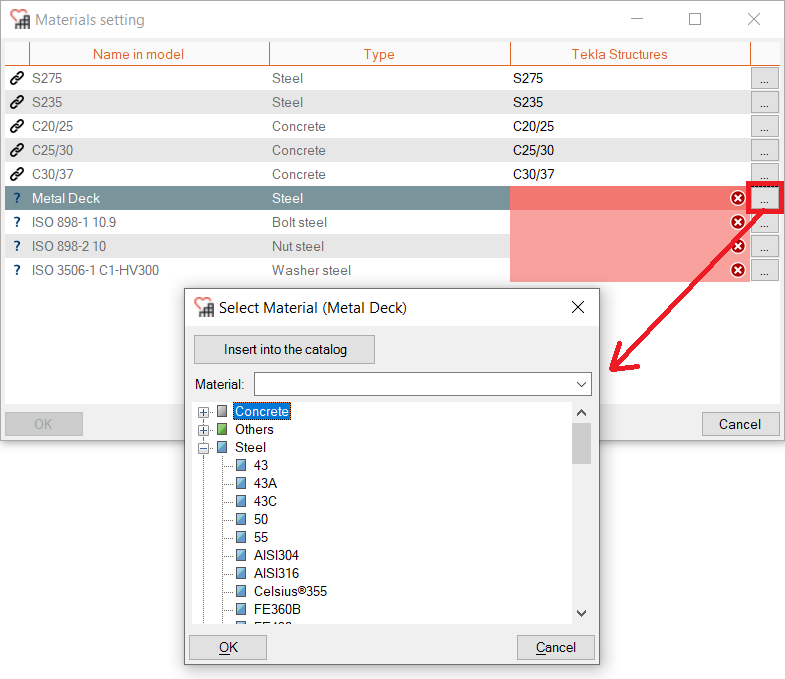
Alternatively, you could type in the Tekla Structures’ material name directly.
2.2.2 Section mapping
In case not all sections can be automatically mapped, you will see a dialog window to map BIM Expert’s section with Tekla Structures’ sections. Click on the button with the 3 dots ![]() to open Tekla Structures’ section library and search for a match. Tekla Structures’ section library depends on the environment that you have chosen. If no sections at all can be mapped, you might want to restart Tekla Structures with a different environment.
to open Tekla Structures’ section library and search for a match. Tekla Structures’ section library depends on the environment that you have chosen. If no sections at all can be mapped, you might want to restart Tekla Structures with a different environment.
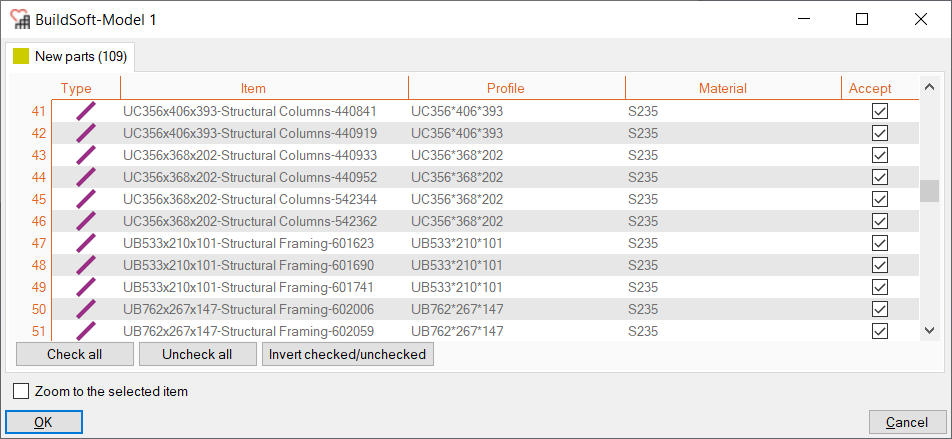
2.2.3 Preview & creating the model
The model will now be previewed in Tekla Structures and you get an overview of all new elements, native Tekla Structures elements. You could choose to leave some elements out by unchecking the ‘Accept‘ box, but in most cases you click ‘OK’ here.
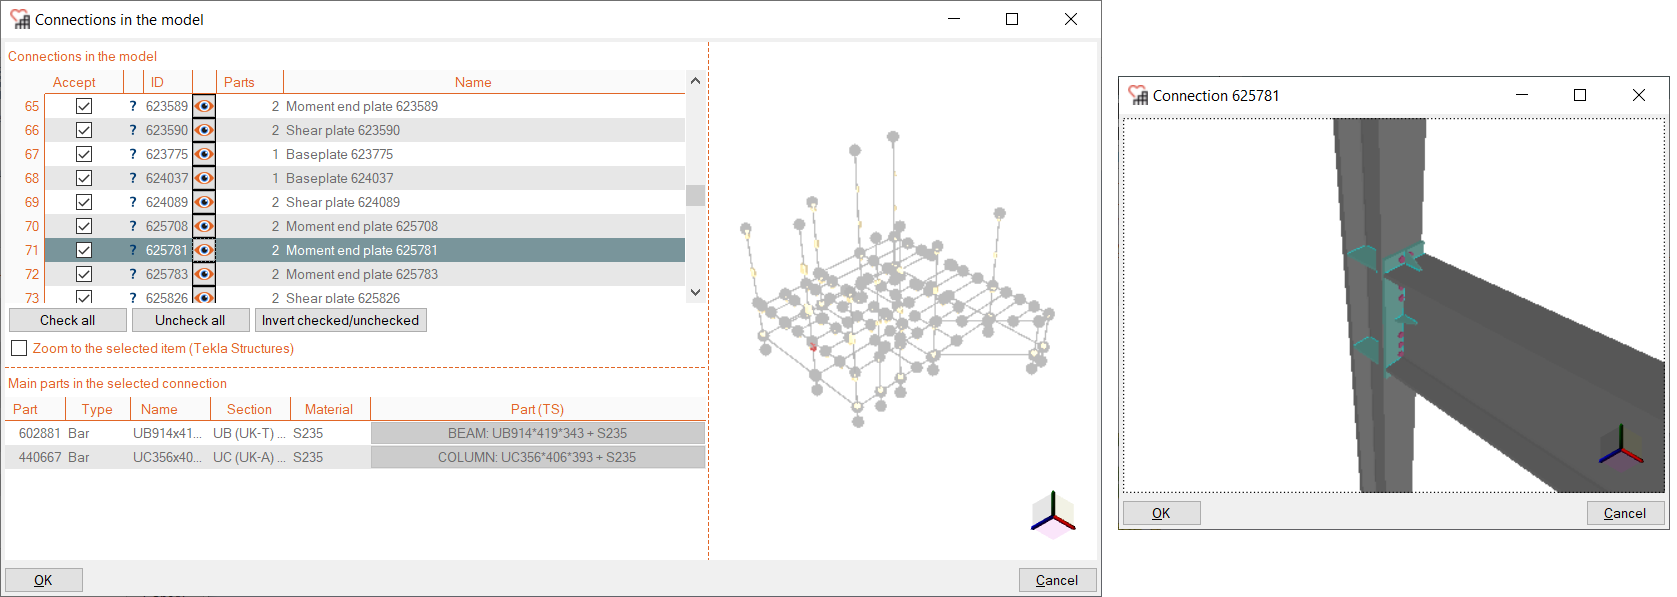
2.2.4 Connections and components
Once the whole model is in Tekla Structures, BIM Expert will start the connection conversion. Whenever possible BIM Expert will convert connections to Tekla Structures components. You will first get an overview of all connections that are recognized as components. When clicking the little eye button ![]() , you get a pop-up window showing the connections. You could choose to leave some elements out by unchecking the ‘Accept‘ box, but in most cases you click ‘OK’ here.
, you get a pop-up window showing the connections. You could choose to leave some elements out by unchecking the ‘Accept‘ box, but in most cases you click ‘OK’ here.
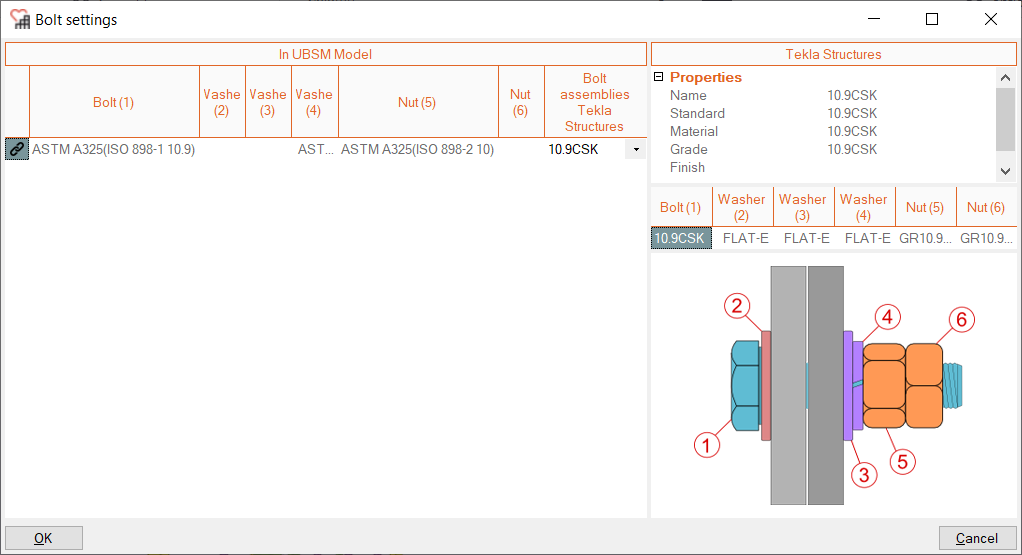
If there are materials of sections to be mapped, they will appear in the next pop-up window. In the column ‘Bolt Assemblies Tekla Structures’ you can set a (different) bolt material.
3. Final steps in Tekla Structures
The model is now in Tekla Structures, ready for the next steps in the project process.
