From Diamonds to Tekla Structural Designer

This article explains how to send a model from Diamonds to Tekla Structural Designer, using BIM Expert.


Attention

This BIM workflow is only for bar elements! Plate elements are currently not supported.

1. Preparation in Diamonds

The transfer to Tekla Structural Designer will be on geometry. The presence of results is not required.

2. Send the Diamonds model to Tekla Structural Designer

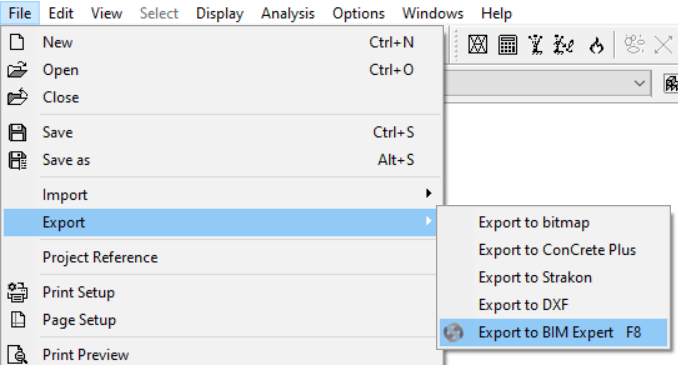
2.1 From Diamonds to BIM Expert

In the File menu tab, select ‘Export > Export to BIM Expert’  or simply use F8.

The geometry model is sent to BIM Expert. All sections and materials are automatically converted and transferred, as well as the loads and results (if present). The model is now in BIM Expert.

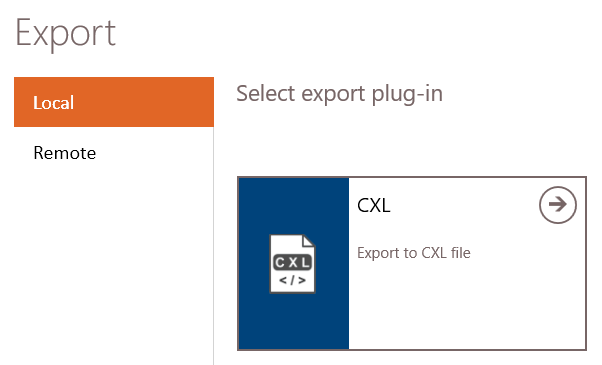
2.2 From BIM Expert to Tekla Structural Designer

In the Model tab, select ‘Export’. Next, choose the destination, namely “CXL’. Click  to continue.

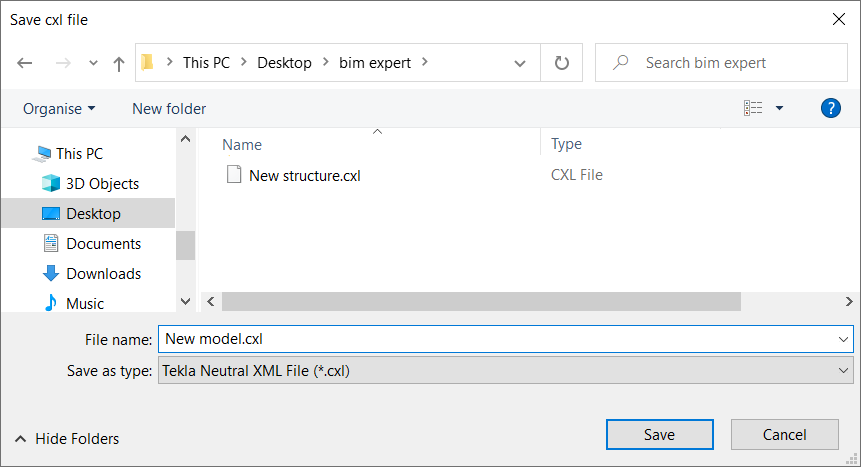
Next, you will be prompted to save the file

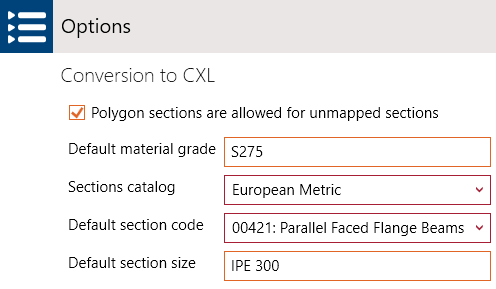
2.2.1 Material & section mapping

Most common materials and sections are mapped according to the TSD neutral file mapping conventions. If there is no match found, a default section and material will be applied. You can specify these defaults in ‘File > Settings > CXL’

3. Final steps in Tekla Structural Designer

  1. On the BIM Integration tab, click Structural BIM Import.

    The BIM Integration wizard opens.

  2. Use the […] button to browse and select the appropriate CXL file.

    The remainder of the fields are populated with the settings read directly from the file.

  3. Click Next to continue.

    The Import Options page shows the settings related to the file, it will indicate if this is a first time import or an update, and allows the user to choose Metric or Imperial for the units, a design code and the default level type. The level type can later be adjusted in the construction levels dialog if required.

  4. Click Next to continue.

    The Relocate Import Model page allows for models to be moved to around the datum position in Tekla Structural Designer from a real world co-ordinate. The extent of the model can be seen from the information displayed on the right hand side of the dialog.

  5. Click Next to continue.

    The Integration Filter will be displayed. The five options shown here allow you to verify if grids, levels etc. are to be imported. Please note that the settings held in the Delete Existing… and four Update… columns should not be used when performing a First Time Import and are only used when synchronizing changes into an existing Tekla Structural Designer model.

  6. Click Next to continue.

    Mapping of materials to recognised grades will be shown now. Here you can view the different materials recognised in the incoming CXL file and the options to alter materials with a more preferred grade.

  7. Click Next to continue (if available).

    Following on from Material mapping, the dialog for Decking mapping will be shown (if applicable). Again this allows users to view the decking types being imported and have the option of overwriting the details if required.

  8. Click Finish

    After the file has completed processing, the model will be displayed within the Structural 3D view and you can then proceed with validation of the structure before applying any analytical information.

4. Get started with BIM Expert

Was this article helpful?

Related Articles

Need Support?
Can't find the answer you're looking for? Don't worry we're here to help!
CONTACT SUPPORT