This article explains how to send a Tekla Structures model to Revit, using BIM Expert.
1. Preparation in Tekla Structures
The transfer is based on the analytical model. So in Tekla Structures you need to create an analytical model first. The quality and coherence (connection between elements) of the analytical model will determine the quality of the structural calculations. It is therefore essential to build a good analysis model in Tekla Structures.
Learn here how to make a good analysis model in Tekla Stuctures.
2. Send model from Tekla Structures to Revit
2.1 From Tekla Structures to BIM Expert
There is more than 1 way to send models from Tekla Structures to BIM Expert. You can either start from
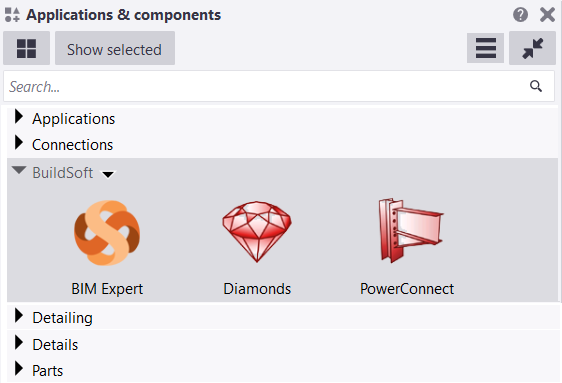
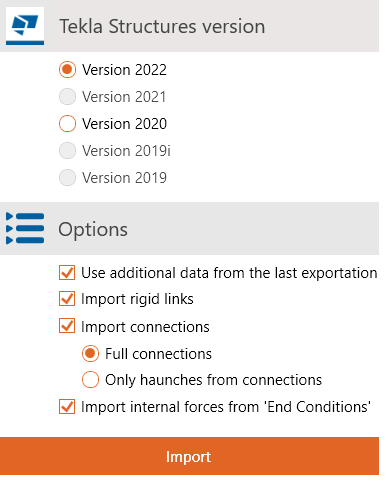
Click the BIM Expert icon to launch the transfer. Next you need to select what items to include, in addition to the Analysis model:
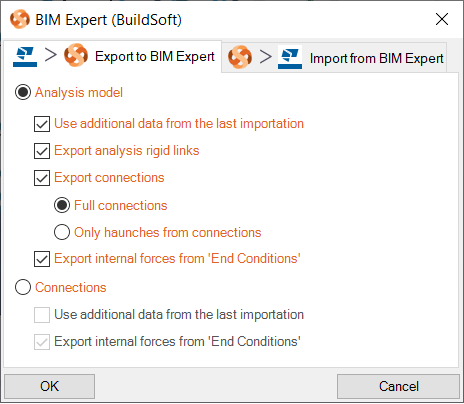
- Additional data: data that came from a previous transfer, but is not supported by Tekla Structures. This information is kept and can now be taken along in the current transfer (e.g. seismic information, soil layers, …)
- Rigid links
- Connection: full or only haunches
- Internal forces from ‘End Conditions’. The End Conditions tab can be found in the element’s UDA (User Defined Attributes):
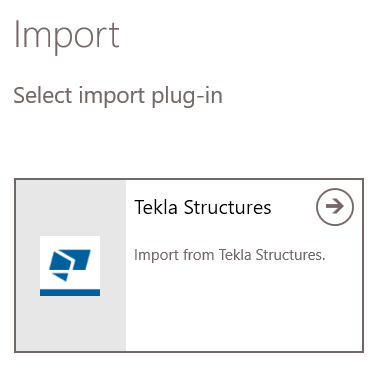
Alternatively, you can start in BIM Expert: click ‘Model > Import’ and select the Tekla Structures plugin. Choose the Tekla Structures version and what elements to import (see above).
No matter the way you have chosen, BIM Expert will now take over.
2.1.1 Settings
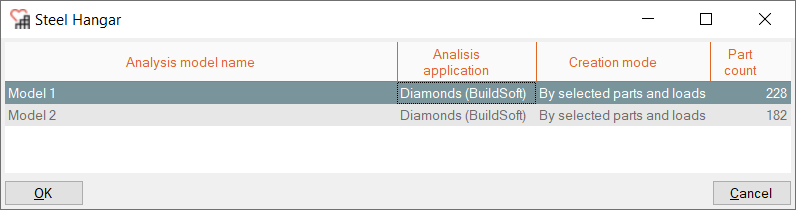
If you have more than one analytical model in Tekla Structures, you need to select the analysis model that you want to transfer
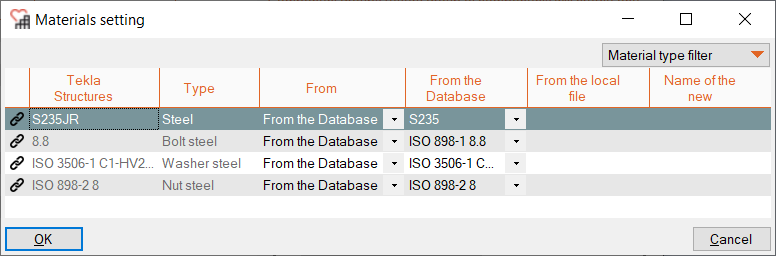
Next, the Tekla Structures sections and materials must be mapped with BIM Expert’s section and material database. BIM Expert will try to find as many automatic mapping matches as possible. In case all sections and materials find a match, you will not see any dialogs for mapping.
2.1.2 Material mapping
In case you have turned off the option to reduce dialog windows, you might see a material mapping dialog for mapping unknown materials. In the ‘reduce dialog window’ case, unknown materials will be added as new.
Database materials such as steel (e.g. S235, ASTM-Grades), concrete (e.g. C25/30, M50) and timber (e.g. C24, D50, GL28c) are mapped automatically. In some cases, the match is not automatically found, because the name differs (Concrete grade C25 instead of Concrete grade C25/30). In that case, you can select the correct material from the database.
Tip: When searching an item in the database, type the first letters of the name to find it more quickly.
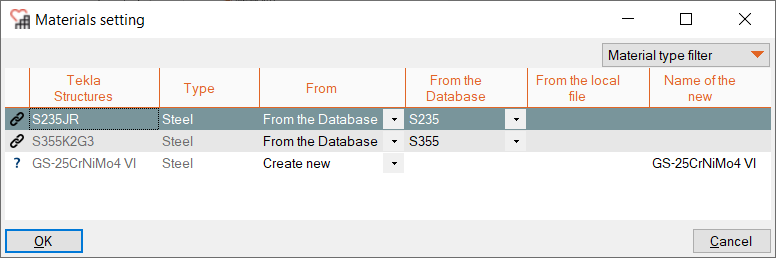
If you cannot find a suited counterpart in the BIM Expert database, the material can be added as new.
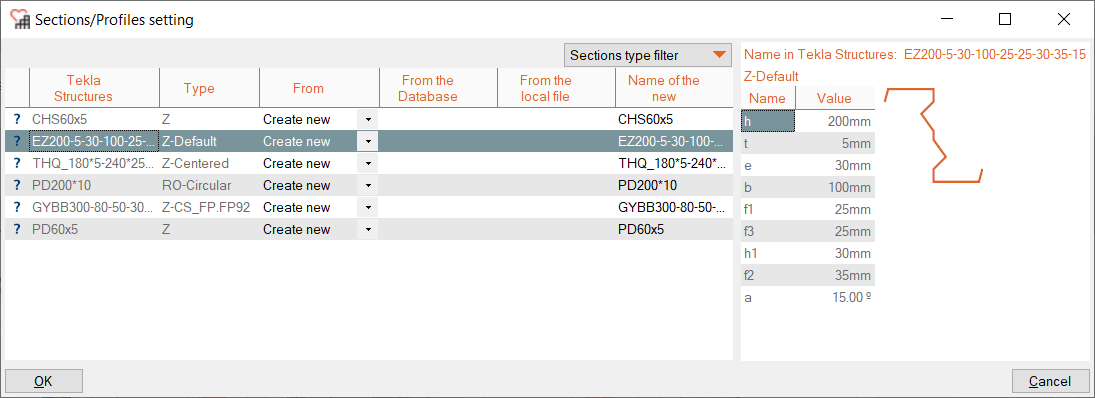
2.1.3 Section mapping
In case you have turned off the option to reduce dialog windows, you might see a section mapping dialog for mapping unknown sections. In the ‘reduce dialog window’ case, unknown sections will be added as new.
Database sections (such as I, H, UB, UC, W, C, U, O, ☐ and L sections) are mapped automatically. In some cases, the match is not automatically found, because the name differs (e.g. name is HEB300 – S235 instead of HEB300). In that case, you can select the correct cross-section from the database.
Tip: When searching an item in the database, type the first letters of the name to find it more quickly.
Parametric sections (e.g. rectangles, circle, trapezium, …) and user defined sections are not in the database. They should always be added as new.
2.1.4 Connections and component bundles
In case you have chosen to export connections and there are connections in the model, BIM Expert will now start the connection conversion.
If you have turned off the option to reduce the dialog windows, you will get an overview of all connections components in the model and the possibility to bundle components.
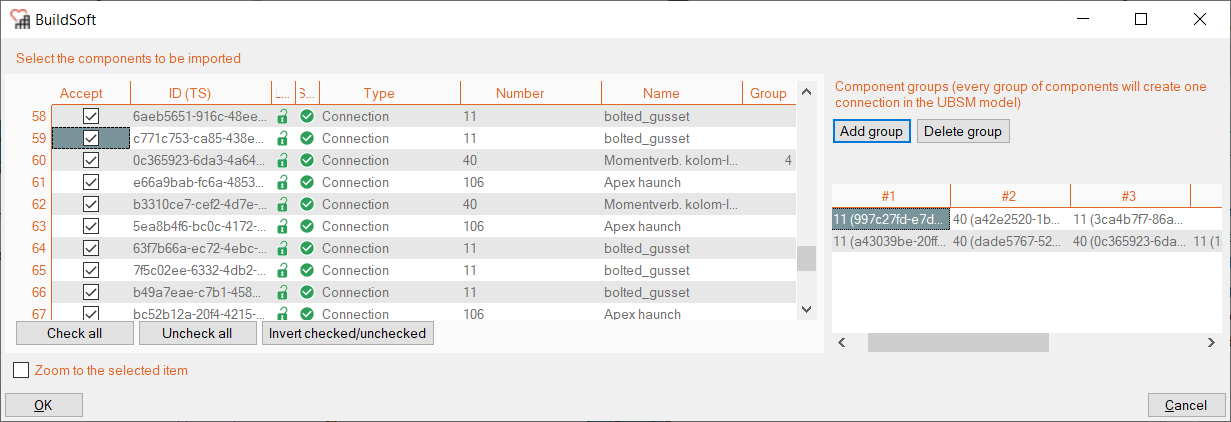
In this window you can do 2 things:
- Select the connections to be included in transfer, via the checkbox in the ‘Accept’ column
- Bundle connection components into larger complex connection groups:
- Position this window in a corner of your screen, because once you start adding groups, the window position is locked.
- Click ‘Add group’ to select the components.
- Select the components by clicking the component arrow. All components should logically be around a single node of course.
- Confirm the selection with the middle mouse button.
- The group is now listed with the reference ids of the individual components.
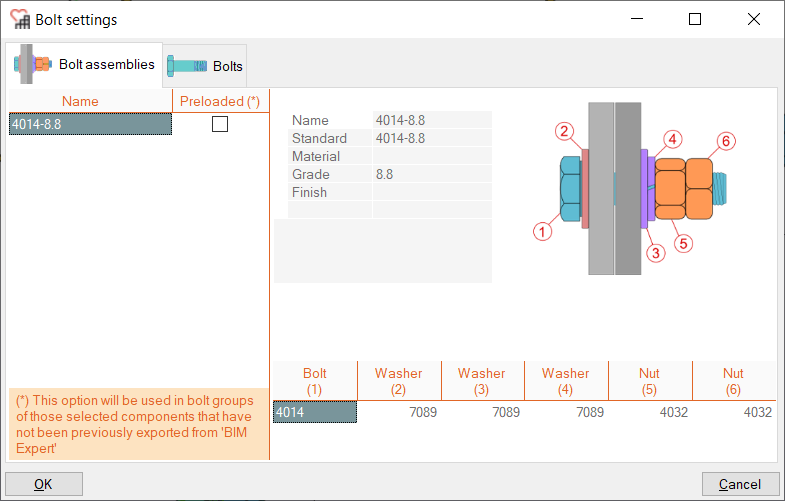
If there are materials of bolt elements to be mapped, they will appear in the next pop-up window.
The model is now in BIM Expert.
2.2 From BIM Expert to Revit
As the export is directly to Revit, make sure that you a empty Revit file open.
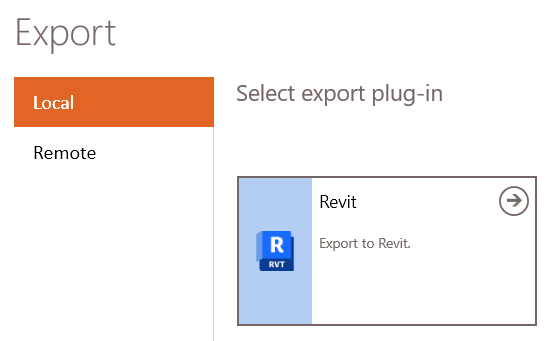
In the Model tab, select ‘Export’. Next, choose the destination software, namely Autodesk Revit. Click ![]() to continue.
to continue.
2.2.1 Settings
In case there is more than 1 Revit file open, you should choose the correct one by clicking ![]()
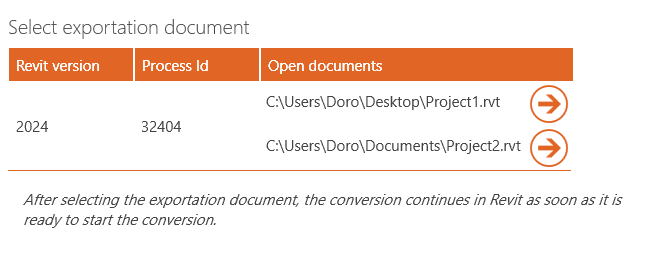
The import will now continue in Revit.
2.2.2 Material mapping
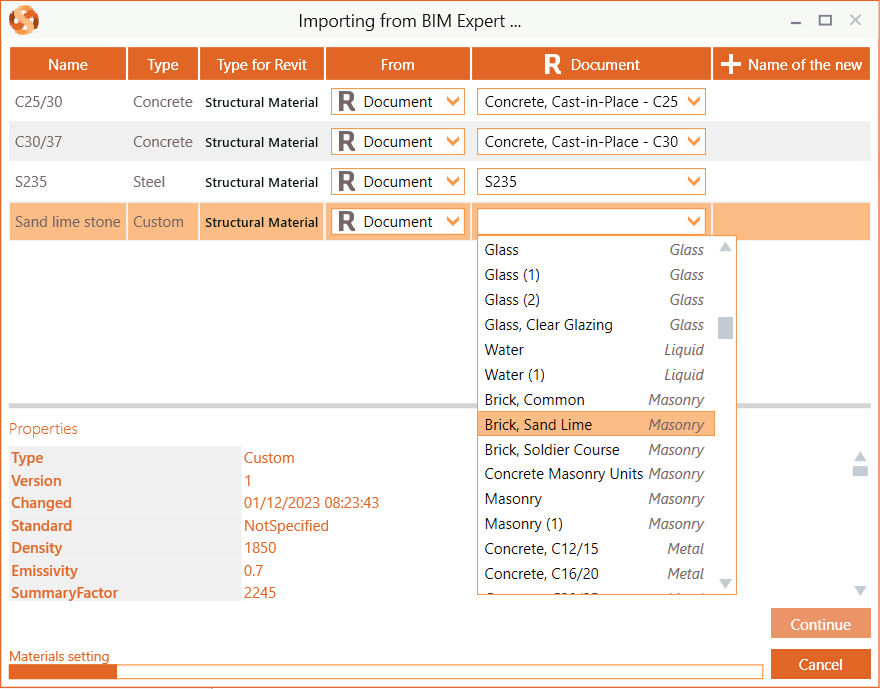
In case not all materials can be automatically mapped with the Revit document materials, you will see a dialog window to map BIM Expert’s materials with Revit’s document materials.
It is good practice to map all incoming BIM Expert materials with Revit document materials. Choose ‘R Document’ and then search for a match in the pull down list. Note that the material should already exist in the Revit material library.
If you cannot find a suited match, you can choose ‘Create New’.
2.2.2 Section mapping
2.2.2.1 Bar sections
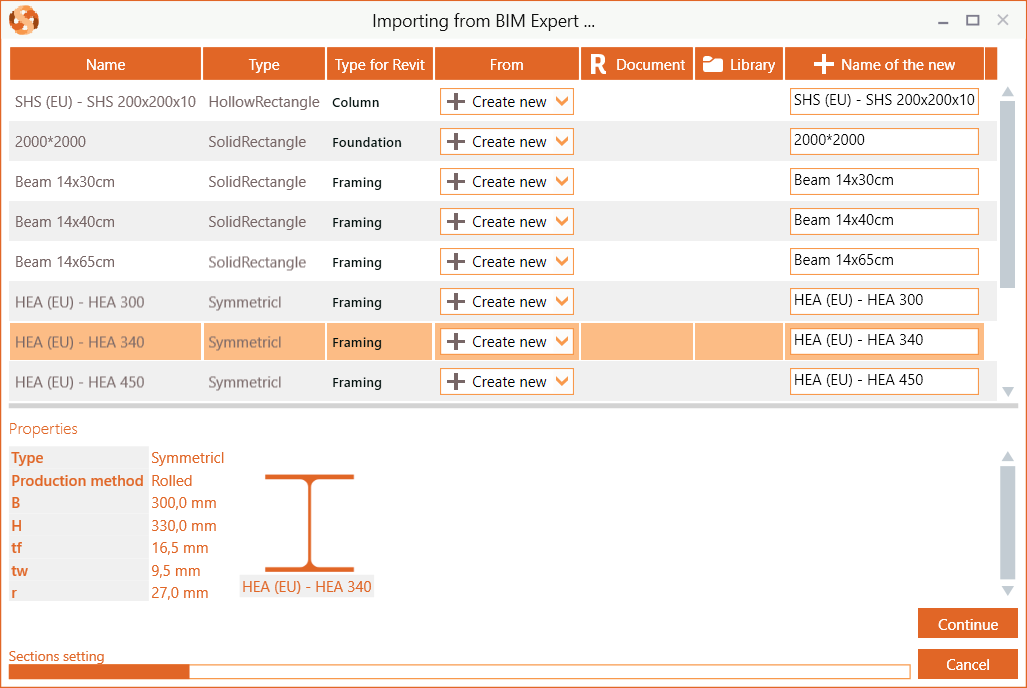
In case not all sections can be automatically mapped with the Revit document sections, you will see a dialog window to map BIM Expert’s sections with Revit’s document sections.
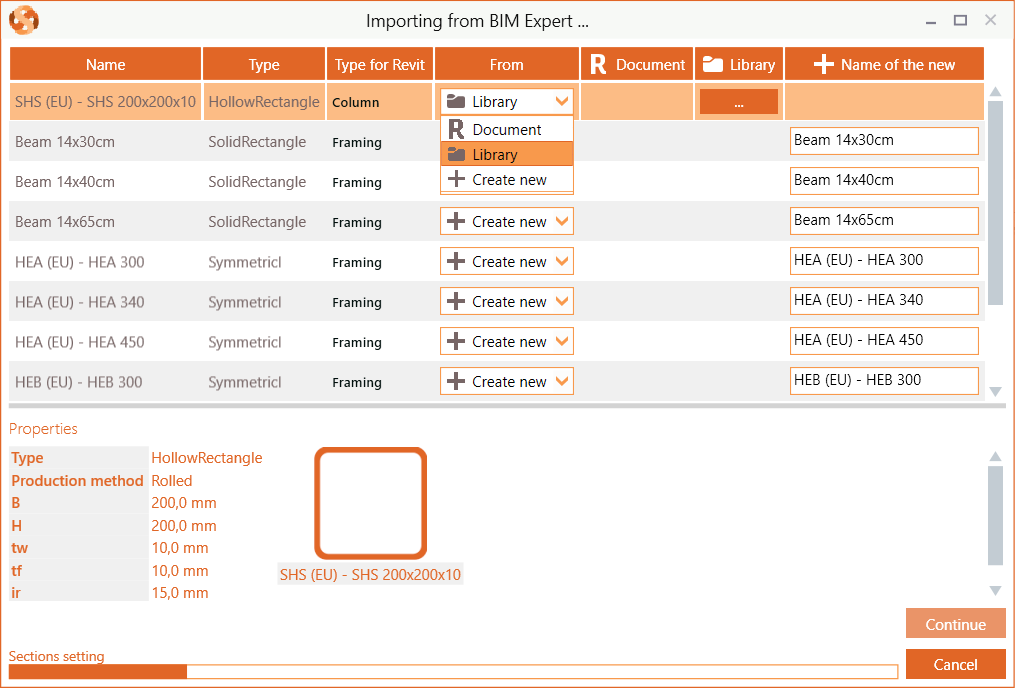
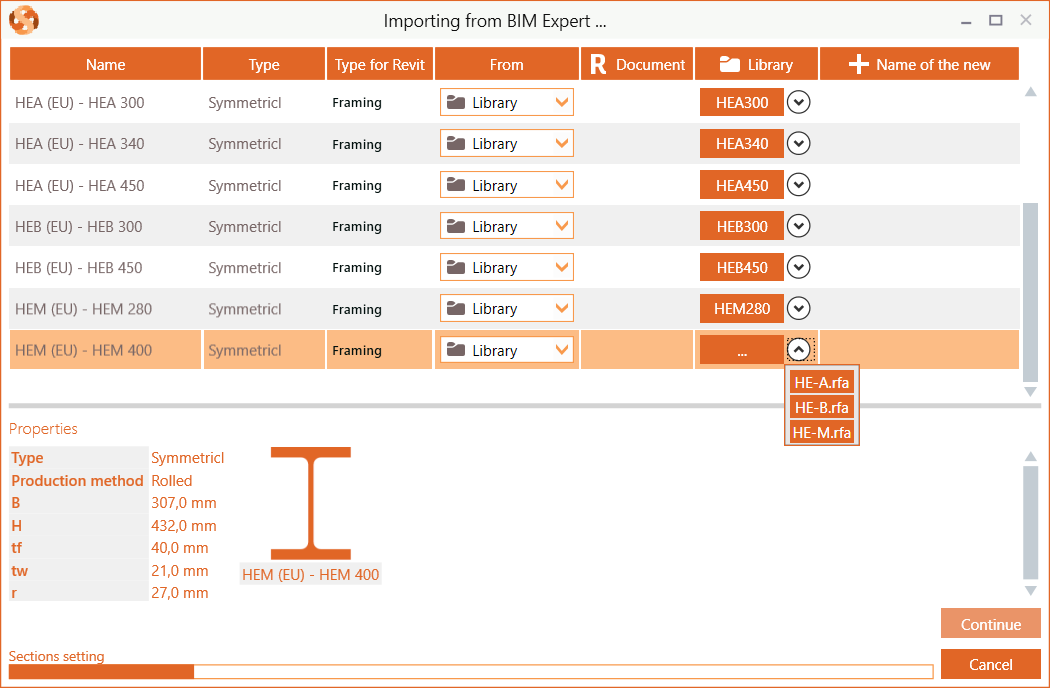
It is good practice to map all incoming BIM Expert sections with Revit document sections. Choose ‘R Document’ and then search for a match in the pull down list. If no suited match can be found, you can choose ‘Create New’ of select it from a ‘Library’.
For I, H, RHS, CHS, L, C. U, rectangular and circular cross-section, BIM Expert will create a new family symbol (cross-section) for you. There is no need to open a Revit library. If the ‘Continue’ button (right bottom corner) is enabled, all sections can be converted and you simply can move forward without any mapping.
When to choose & open ‘Library’?
- you are using “non-typical” shapes
- you have created your own family of cross-sections (symbols) to match
- you really want to match with existing Revit libraries
Click on the 3 dots in the Library column to open File Explorer. Next, navigate to the library of your choice and open it.
Downloaded libraries from the Autodesk website are usually installed at
C:\ProgramData\Autodesk\RVT {latest version}\Libraries
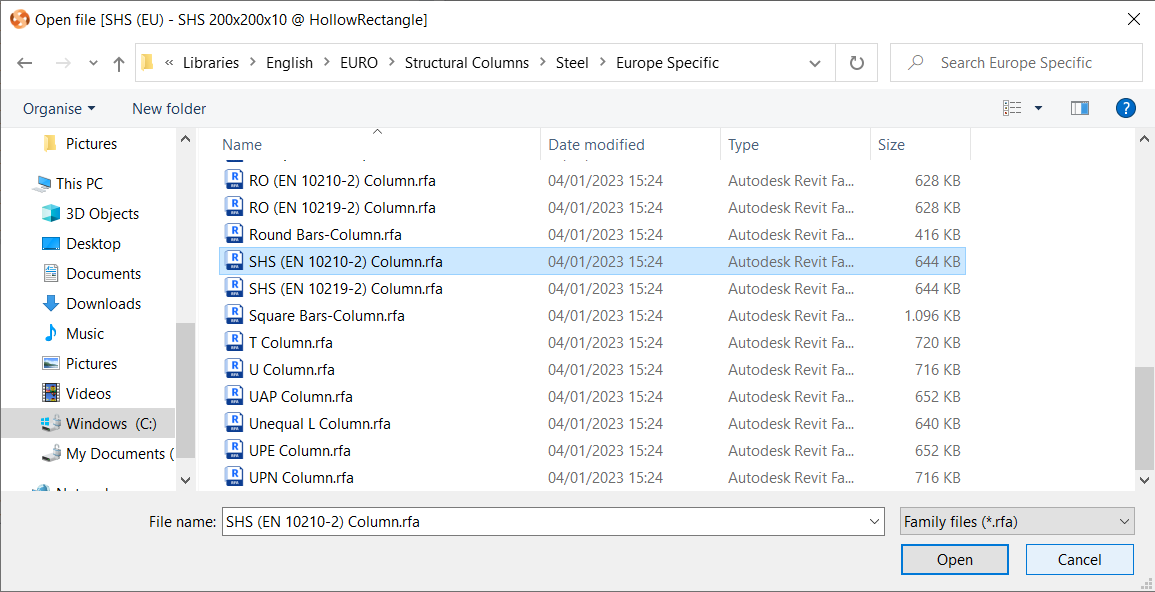
Note: Libraries can be user-made, delivered by a suppier/partner or downloaded from the Autodesk Revit website.
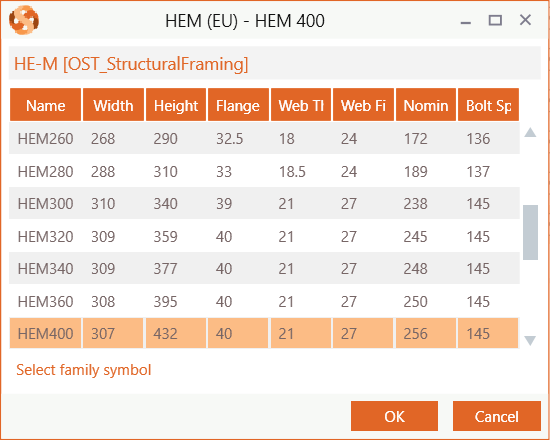
A new dialog window will pop up to select the matching family symbol (cross-section).
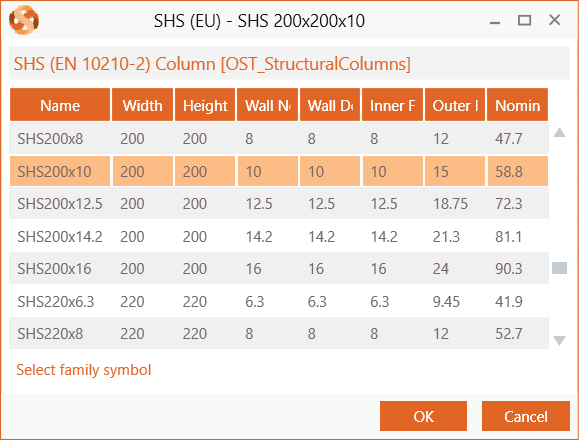
When there is at least one library loaded, you can choose it again for next matching operations. BIM Expert will try to find a match.
2.2.2.2 Plate sections
In case not all plate sections can be automatically mapped with the Revit document plate sections, you will see a dialog window to map BIM Expert’s sections with Revit’s document plate sections.
Choose ‘R Document’ and then search for a match in the pull down list. If you cannot find a suited match, you can choose ‘Create New’. It is not uncommon to add all plate sections as new.
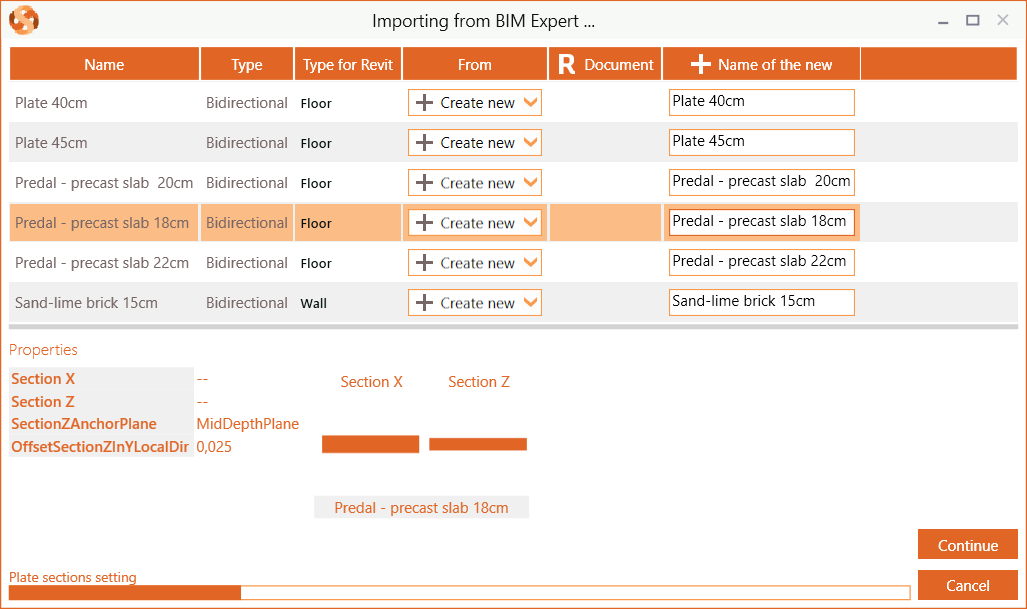
Note: The slab type ‘Breedplaat/Predal’ is converted to a precast slab in Revit. However, the original plate configuration is saved. When converting to other software supporting this type of slabs (ex. Diamonds), the plate will be recognized as ‘Breedplaat/Predal’.
2.2.4 Connections and components
Connections are currently not being transferred.
3. Final steps in Revit
The model is now in Revit, ready for the next steps.
