Section Utility allows you to create concrete cross-section with arbitrary shapes. But those shapes come the some difficulties, like the gross cover and the position of the resulting reinforcement zones).
Section Utility/ Diamonds cannot determine the gross cover/ reinforcement zones automatically. It is up to the user to define those:
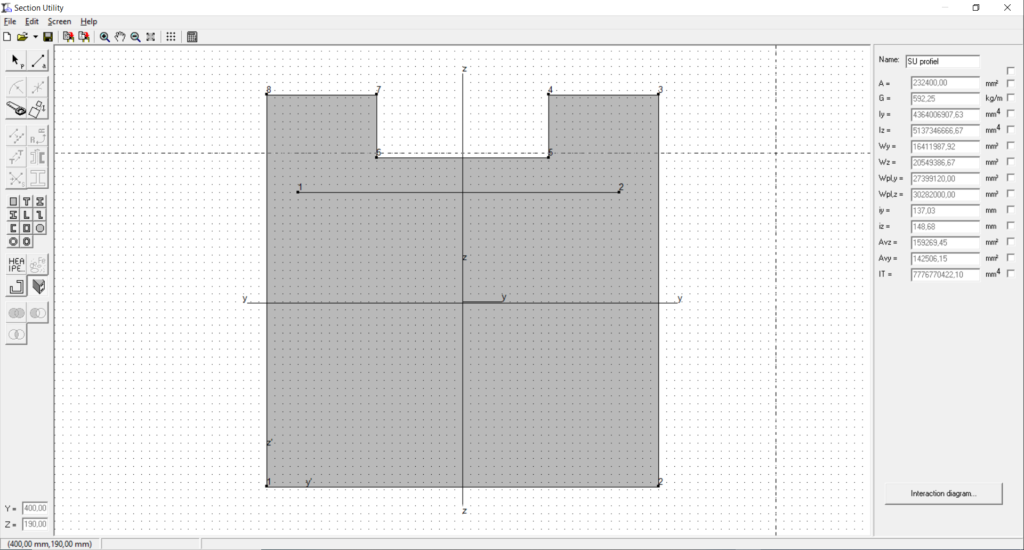
- Select the relevant cross section and open it in Section Utility. For example this one below.

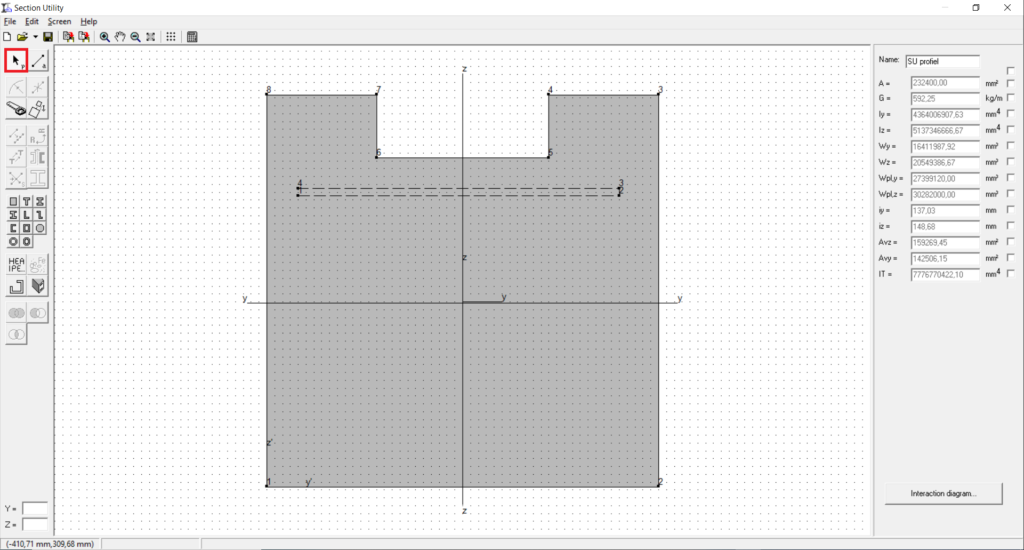
- Click on the button
 on the left side.
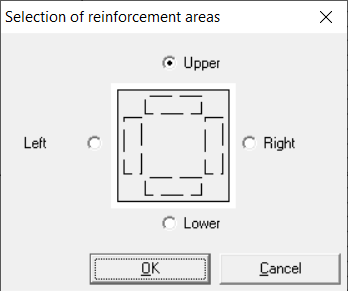
 - Select the position of the reinforcement zone (upper, right, lower or left) you’d like to define. For example Upper and hit OK.
- A drawing function will become active allowing you to draw the centerline of the reinforcement zone.
Click once with the left mouse button to define the start the reinforcement zone. Keep the left mouse button pressed in as you move towards the end of the reinforcement zone. Left go of the left mouse button to define the end of the reinforcement zone. A line will be drawn.
- Click on the button
 to end the drawing function. The line will change into a rectangular zone.
- The reinforcement zone for the upper reinforcement is now defined.
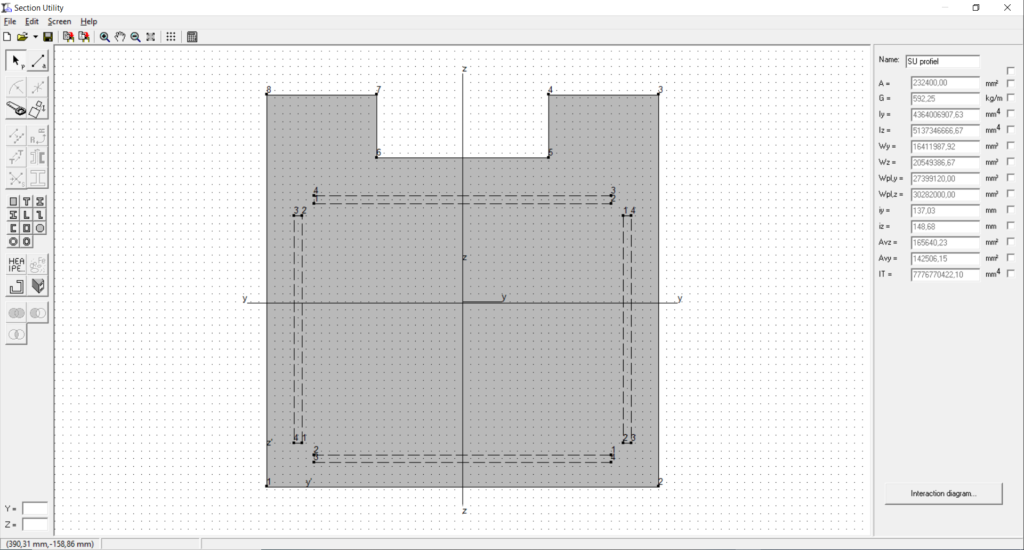
Repeat the steps for the right, lower and left reinforcement like in the image below.
Note: the reinforcement zone is always a straight line. For that reason it is not possible to define curved reinforcement zones.
