This article explains how to send a model from SAF file to Revit, using BIM Expert.
1. Good to know
SAF (Structural Analysis Format) is a file format that is supported by many programs, so this workflow can also be used when you want to go
- From SCIA Engineer to Revit
- From Risa to Revit
- From Graphisoft / Archicad to Revit
- From Allplan to Revit
- From RadImpex to Revit
- From AxisVM to Revit
- From Sofistik to Revit
- From Dlubal to Revit
- From mbAECStrukturEditor to Revit
- From D.I.E to Revit
- From InfoGraph to Revit
- From NextFEM to Revit
- From MasterSap to Revit
- From Prota Structure to Revit
- From Karamba3D to Revit
In the relevant software, make an export to SAF file and continue with the steps below.
2. Send the SAF model to Revit
2.1 From SAF to BIM Expert
In the Model tab, select ‘Import’. Next, choose ‘SAF’. Click
2.1.1 Material mapping
Database materials such as steel (e.g. S235, ASTM-Grades), concrete (e.g. C25/30, M50) and timber (e.g. C24, D50, GL28c) are mapped automatically. In some cases, the match is not automatically found, because the name differs (Concrete grade C25 instead of Concrete grade C25/30). In that case, you can select the correct material from the database. Below the material list, there is a list of the current selected material’s properties. If you cannot find a suited counterpart in the BIM Expert database, the material can be added as new.
2.1.2 Section mapping
Database sections (such as I, H, UB, UC, W, C, U, O, ☐ and L sections) are mapped automatically. In some cases, the match is not automatically found, because the name differs (e.g. name is HEB300 – S235 instead of HEB300). In that case, you can select the correct cross-section from the database. Parametric sections (e.g. rectangles, circle, trapezium, …) and user defined sections are not in the database. They should always be added as new.
The model is now in BIM Expert.
Parametric sections (e.g. rectangles, circle, trapezium, …) and user defined sections are not in the database. They should always be added as new.
The model is now in BIM Expert.
2.2 From BIM Expert to Revit
Shortcode
As the export is directly to Revit, make sure that you a empty Revit file open.
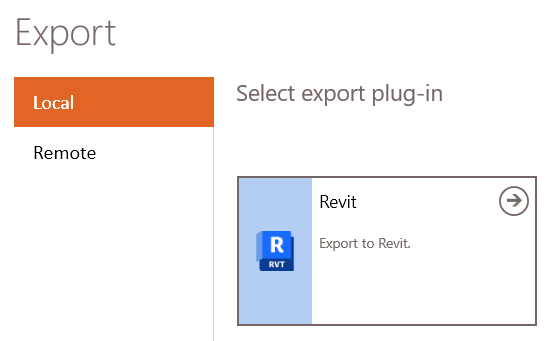
In the Model tab, select ‘Export’. Next, choose the destination software, namely Autodesk Revit. Click ![]() to continue.
to continue.
2.2.1 Settings
In case there is more than 1 Revit file open, you should choose the correct one by clicking ![]()
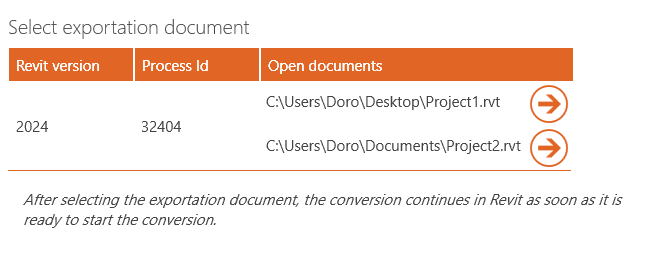
The import will now continue in Revit.
2.2.2 Material mapping
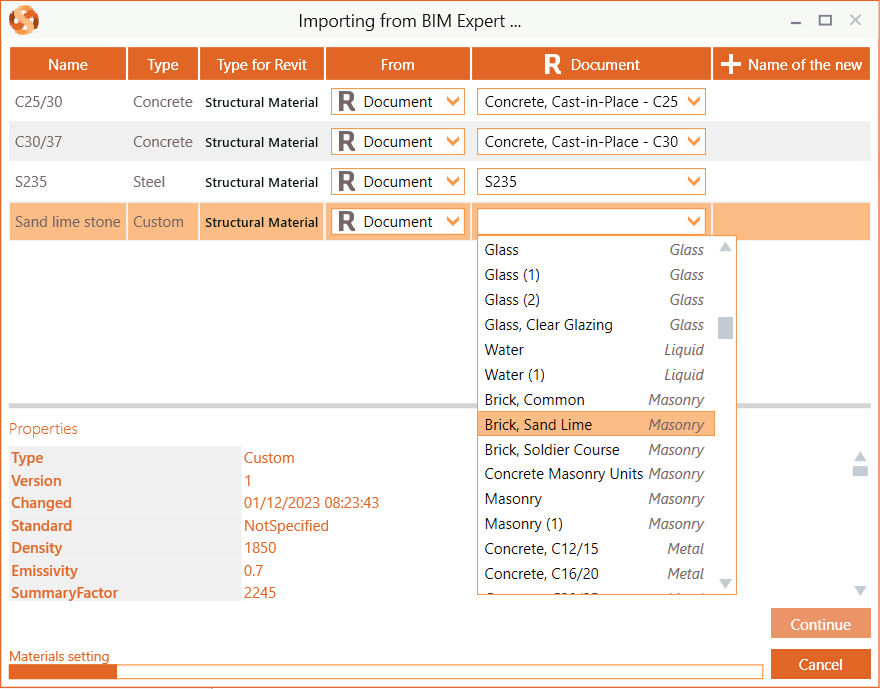
In case not all materials can be automatically mapped with the Revit document materials, you will see a dialog window to map BIM Expert’s materials with Revit’s document materials.
It is good practice to map all incoming BIM Expert materials with Revit document materials. Choose ‘R Document’ and then search for a match in the pull down list. Note that the material should already exist in the Revit material library.
If you cannot find a suited match, you can choose ‘Create New’.
2.2.2 Section mapping
2.2.2.1 Bar sections
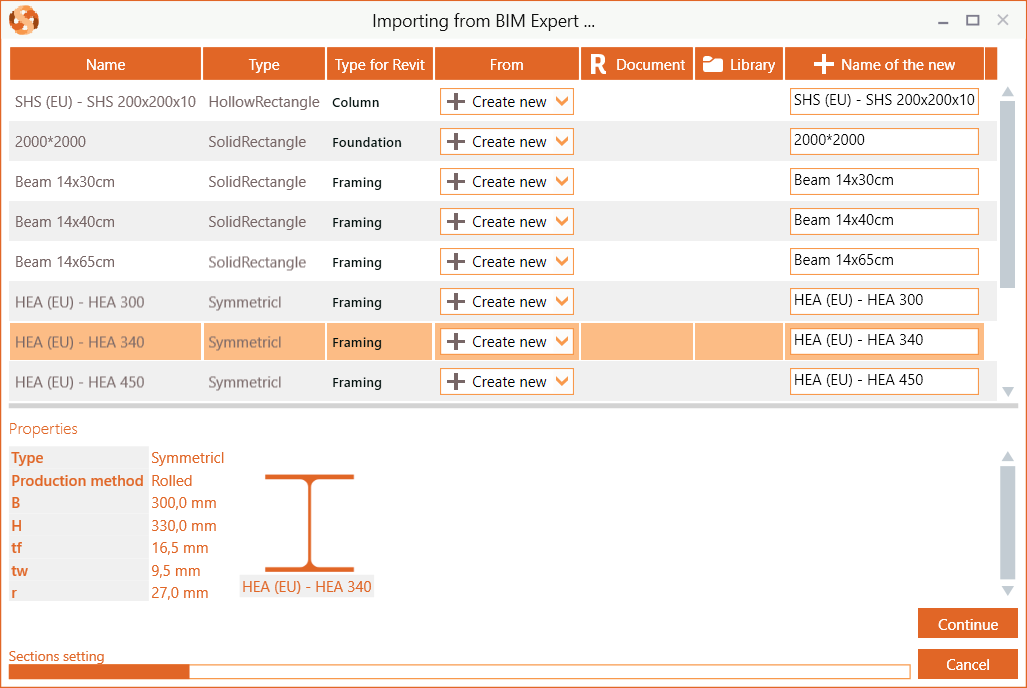
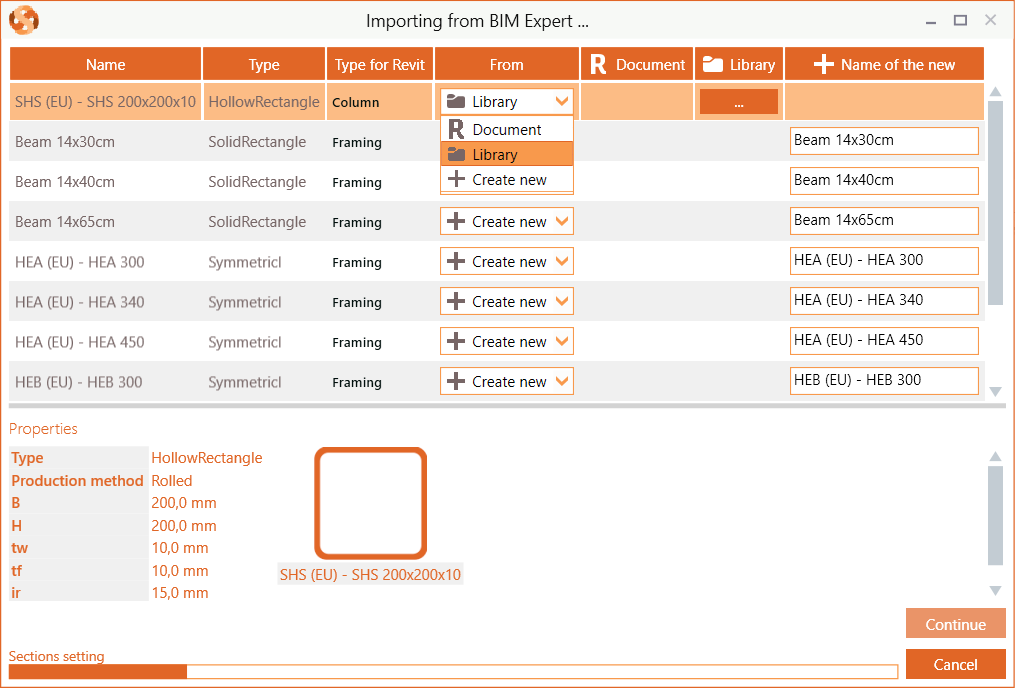
In case not all sections can be automatically mapped with the Revit document sections, you will see a dialog window to map BIM Expert’s sections with Revit’s document sections.
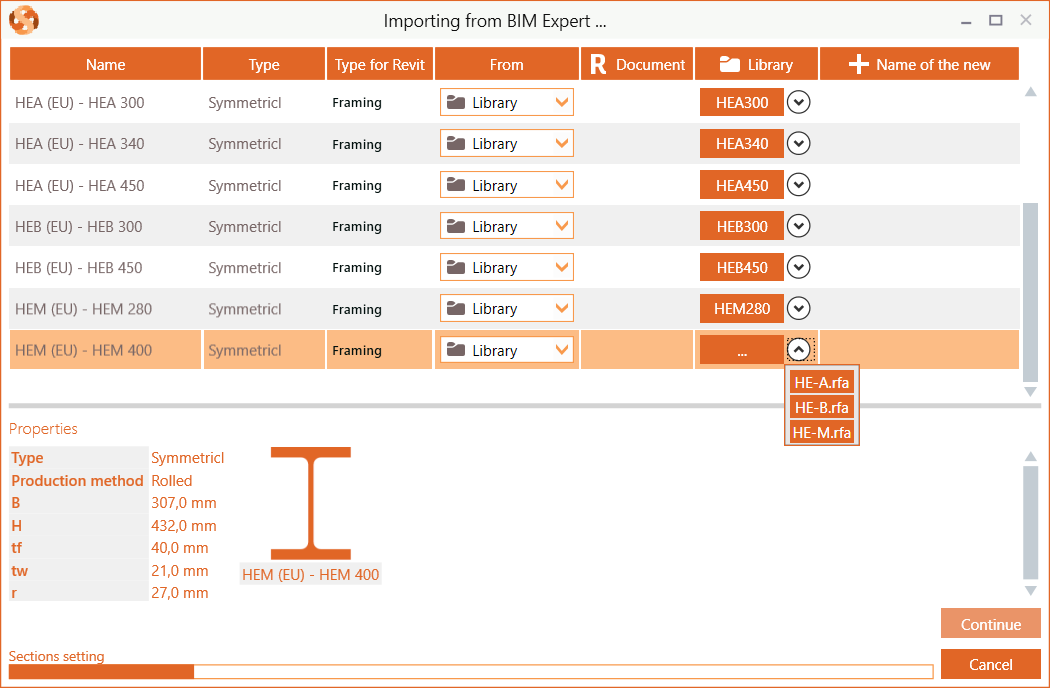
It is good practice to map all incoming BIM Expert sections with Revit document sections. Choose ‘R Document’ and then search for a match in the pull down list. If no suited match can be found, you can choose ‘Create New’ of select it from a ‘Library’.
For I, H, RHS, CHS, L, C. U, rectangular and circular cross-section, BIM Expert will create a new family symbol (cross-section) for you. There is no need to open a Revit library. If the ‘Continue’ button (right bottom corner) is enabled, all sections can be converted and you simply can move forward without any mapping.
When to choose & open ‘Library’?
- you are using “non-typical” shapes
- you have created your own family of cross-sections (symbols) to match
- you really want to match with existing Revit libraries
Click on the 3 dots in the Library column to open File Explorer. Next, navigate to the library of your choice and open it.
Downloaded libraries from the Autodesk website are usually installed at
C:\ProgramData\Autodesk\RVT {latest version}\Libraries
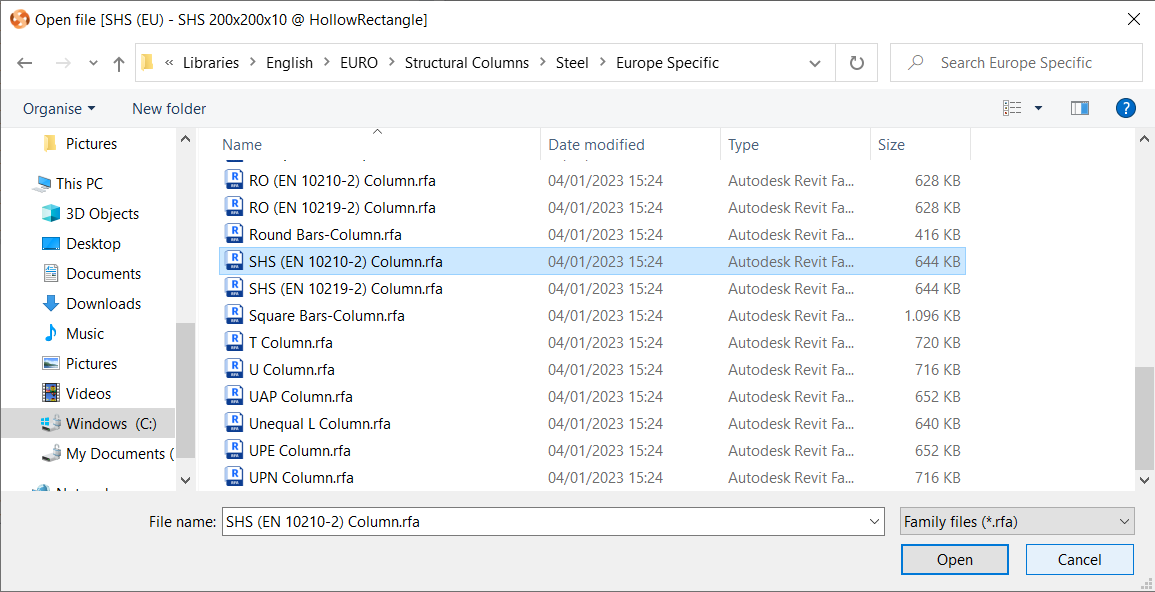
Note: Libraries can be user-made, delivered by a suppier/partner or downloaded from the Autodesk Revit website.
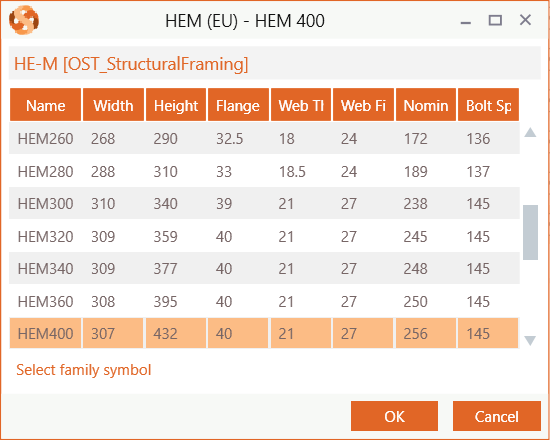
A new dialog window will pop up to select the matching family symbol (cross-section).
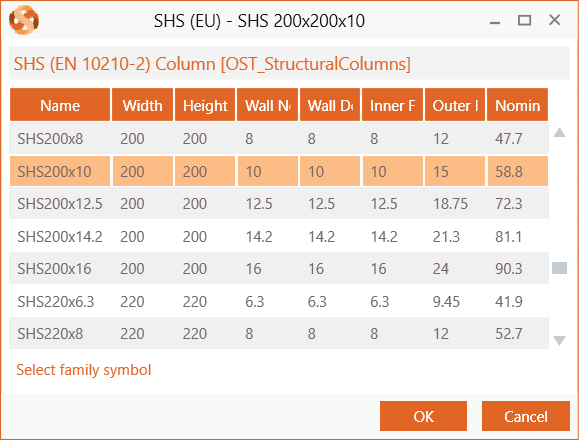
When there is at least one library loaded, you can choose it again for next matching operations. BIM Expert will try to find a match.
2.2.2.2 Plate sections
In case not all plate sections can be automatically mapped with the Revit document plate sections, you will see a dialog window to map BIM Expert’s sections with Revit’s document plate sections.
Choose ‘R Document’ and then search for a match in the pull down list. If you cannot find a suited match, you can choose ‘Create New’. It is not uncommon to add all plate sections as new.
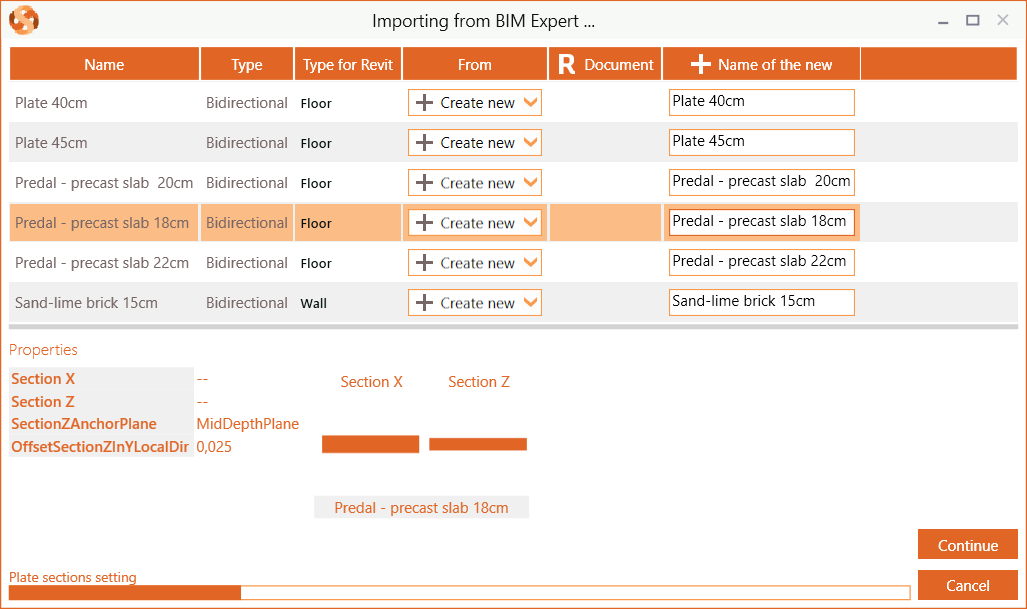
Note: The slab type ‘Breedplaat/Predal’ is converted to a precast slab in Revit. However, the original plate configuration is saved. When converting to other software supporting this type of slabs (ex. Diamonds), the plate will be recognized as ‘Breedplaat/Predal’.
2.2.4 Connections and components
Connections are currently not being transferred.
3. Final steps in Revit
The model is now in Revit, ready for the next steps.
